EQ Cheat Sheet: How to Use An Instrument Frequency Chart [Infographic]
How to EQ: Super Frequencies
Mixing music correctly heavily involves knowing how to use an EQ to equalize audio.
The better you are at knowing your frequencies and how they interact in your mix the more professional your mix will sound.
Fortunately, Audio frequencies are not hard to manage as long as you know what they do. The first step to understanding how to EQ is knowing where your recordings sit in the frequency scale.
This is why I have made this EQ cheat sheet for your EQ referencing.
Visualizing where each instrument sits in the frequency scale will help you determine which frequencies and sounds are clashing with each other in your mix, and will help you achieve the highest quality mix before proceeding to the mastering process.
Choose Your Sounds Wisely
The EQ is a great weapon. However, it does have its limits.
If your mix has a bunch of instruments clashing in the same frequency field, you will most likely need to adjust your EQ to let them all breathe and be heard perfectly.
Therefore, you must choose your sounds carefully and always try to achieve the best possible recording. The EQ is something you use in your mix, not obliterate it.
It's always best to follow the best recording practices to get a clean recording before you start doing any mixing.
EQ won’t always make a poor recording sound good. But it definitely has the ability to make a good recording sound awesome.
Mikes Mix & Master EQ Cheat Sheet

Take a good look at this sheet and remember it well. Save it to your computer for fast referencing, or keep it on your mobile device.
Please keep in mind! This is only a starting point. The audio in your mix will always own its own properties. So apply this chart as a starting reference, however, you must use your own mix as a reference for adding EQ.
This chart is not a rule you must abide by, but rather a great reference to get you started on understanding where your sounds sit in your mix, therefore, it should be used correspondingly.
How to Use A Frequency Chart
It's easy to use the instrument frequency chart. Just think about the sounds of each instrument before you record your tracks.
Imagine where your instruments will sit in your mix before you begin recording.
Choosing the instruments by their frequencies before you begin, will make the mixing stage more manageable.
Electronic instruments can be complex when finding the fundamentals because They generally create a broad range of frequencies and sounds.
To avoid this, simply figure out which sound you will be trying to synthesize in your mix with your instruments.
For example: If you will use a synth to make a pluck lead sound, then the fundamental for the pluck instrument you are looking to synthesize should be applied.
You won’t know until it can be heard in your mix. But try to be prepared before you record.
There is no rule for which frequencies will cause problems for which sound.
Make sure to use your ears and eyes, to see and learn from your mix after you’ve recorded your material.
You can definitely use as many sounds as you want that are in a certain frequency. However, the more sounds you use, the easier it is to check important information. So when you EQ, you will have to be more convoluted to make sure everything sounds correct.
Rolling in the deep
Almost all parametric EQs include a high pass and low pass filter. These are great places to start with some corrective EQ to create space within your mix.

Sounds that have higher components, will also have data in the lower frequencies.
Most times, the lower frequencies from sounds with a higher component and reverse can be rolled off. This is what high and low pass filters are for.
Instead of adding specific cuts or boosts, the high and low pass filters will eliminate unwanted frequencies on a bigger scale.
The high-pass filter is usually used to eliminate low frequencies on your instruments with a higher frequency like a cymbal or snap.
The low frequencies that these sounds consist of might be muddying up your low frequencies. Adding a high pass will give your lower-end sounds more space to breathe while giving your higher-frequency sounds more transparency in your mix.
The opposite goes for your low-pass filter. Eliminating needless high frequencies from your lower sounds gives everything room to work in the high-end range.
Remember that all sounds contain critical information in high and low frequencies. So take out what only absolutely needed. Always use your ears to determine the right amount.
Band Sweeping
Sweeping in your EQ is the best option when it comes to pointing out the problem areas within your mix. EQ sweeping helps you pinpoint the exact frequencies you are trying to resolve. How is this done?
To begin, set a point with a narrow bandwidth and a high gain (the ‘Q’) in your parametric EQ. Play your track and ‘sweep’ the Q point from left to right across the frequencies.
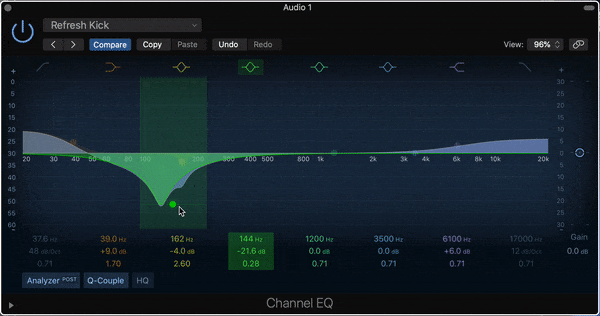
Listen carefully until the problem you need to resolve stands out. Once it's heard, you know you have figured out the frequency you need to remove.
If you need to take out some rumble from a guitar stroke, sweep the EQ until you find where the rumble is most noticeable. When the problem is found, remove the frequency you pointed out and listen again.
Occasionally, some problems can be resolved with high and low pass filtering spoken about above. However, doing an EQ sweep will help you isolate the exact areas that might need boosting or cutting.
Tip: Make sure to focus on the problem you want to cut. Raising the gain in any spot will make things sound less than fitting. Don’t just remove everything that doesn't sound good. Focus on pointing out one definite fix at a time.
Keep your Cuts Narrow
Now that you have found your problem frequencies it is time to add cuts to constrict the dirty.
As general guidelines, focus on keeping your cuts less than 4dB. Anything more than that can be too obvious. But remember, it's what you prefer.
Keep your bandwidth narrow for cuts. Remember, cutting is removing data from your audio, therefore, the wider the bandwidth (Q), the more character you are taking from a sound. This is why finding your target problem frequency is very important. It will allow you to remove only what's needed.

Boost it Wide
EQ boosts need a wider Q. Boosting with a more narrow curve can make frequencies stand out in the mix. A wider curve (Q) will help make your boosts sound more organic.
The reason Wider bandwidths work it because of how we hear, you can’t deny science right? The ear likes organic sounds. A wider Q will help to keep your boosts as natural as they can be.

Boosting is how you can get experimental with EQing and bring some cool character out of your sounds. Play around with boosts outside of the norm. Subtle boosts to the harmonics of your can have interesting results for creating presence and punch in your mix.
Tip: Using a spectrum analyzer, or an EQ that has a spectrum analyzer built can pinpoint interesting harmonics to bring out or remove.
Messing around with EQing harmonics can add some character and richness to your sounds. They are also a perfect place to look if you’re experiencing cluttered sound. Try both for the best results!
Freqs-Pan
Panning is a great way to create space between two instruments that have the same frequencies.
If you don't want to alter your instrument's sound with EQ but you are still hearing some clashing in the mix, try panning one instrument to the right and the other to the left.
Giving clashing instruments their dedicated space inside the stereo field, will bring out their unique frequencies and help differentiate them within the mix.
It’s always your choice.
Using panning to give your sounds room means less frequency clashing between your sounds. It doesn’t always fix the problem, however, panning is something you should be done in every mix anyway!
The low and high pass rules still apply for taking out the unwanted frequencies, however, panning gives you more options if you don’t want to change the character of your instruments just to make two or more instruments sit.
Listen in Full. Not just Solo.
The biggest downfall when it comes to EQ is getting attached to your isolated instruments. ALWAYS listen to the entire mix and EQ appropriately. Your instruments are puzzle pieces of a whole and how you create using EQ has to be reliant on their role within the entire mix.
If you just EQ the soloed sound, you are missing the whole point.

When in doubt try to think as the listener. They aren’t going to hear the instruments in your track soloed like you do when mixing. They will listen to the song as a whole only. So let your entire mix help you with your EQ decision-making.
Some instruments might even sound ‘awful’ when they are soloed. But when they play in the whole mix they will sound great. That's what good mixing is about, specifically when it comes to EQ.
EQ is just the start
Well-recorded audio is always the first step to getting a good mix. But what can make your mix amazing is brilliant EQing.
Make sure to put these tips to good use with your EQ experimenting and see what good it can do for your mixes.
Need a hand?
If you need extra assistance, check out my Vocal Chain Collection, This vocal chain collection allows you to get my signature vocal preset setup and sound for mixing vocals with stock plugins. No need to have third-party plugins. The chain provides a general order of your channel strip for processing your vocal tracks and contains processing for Compression, EQ, Gain, De-Esseing, Pitch Correction, and Noise Gating. All of which include my custom presets for each plugin.
For many artists, hiring a professional mixing and mastering engineer is the next step to making sure your music is commercial-ready. For artists who want to focus on creating music, working with experienced audio engineers takes away the stress, time, and learning curve of mixing and mastering.
If you are looking for an audio engineer to take on mixing and mastering your project, Mikes Mix & Master is here to help bring your vision to the next level, ensuring that your music is of the highest quality to give you a competitive advantage in the music industry. Please visit our website or contact us to learn more.